Recent Posts

Related Posts Plugin for WordPress, Blogger...

Friday, October 28, 2016

Carrot Cake with Cream Cheese Frosting


Carrot cake is a favorite around here. We love it for fall and we love it for Easter!  This recipe has been on repeat for us the last few years!    


You can bake it in a 9x13 cake pan or in a bundt cake pan if you're wanting something a little fancier.  I love this even more the next day, so if you like to plan ahead you can make it a day or two in advance which makes it a nice option when you have guests to serve.
I'm a bit of a carrot cake purist, and prefer my cake with no nuts or pineapple.  You can totally add nuts in if that's your jam.  I enjoy it chilled, right out of the refrigerator.  I also like to eat any leftovers for breakfast, just so you know.  It has vegetables in it so it's a totally acceptable breakfast food.
If you're on the hunt for a great dessert to serve for a fall gathering or Easter dinner, we hope you'll try this one! 

Carrot Cake

Yield: 1 bundt cake or 1 9x13 cake


Cake:
4 eggs
¾ cup oil
½ cup applesauce
1 cup white sugar
1 cup brown sugar
2 teaspoons vanilla
2 cups all-purpose flour
2 teaspoons baking soda
2 teaspoons baking powder
1 teaspoon salt
2 teaspoons cinnamon
3 cups carrots, grated (also works well to chop into  bits/chunks in the food processor)
1 cup pecans, chopped (optional)

Cream Cheese Frosting:
½ cup butter, softened
8 ounces cream cheese, softened
¼ teaspoon salt
3 cups powdered sugar
1 teaspoon vanilla

Directions:


Preheat oven to 350 degrees F. Grease and flour a bundt pan or 9x13 pan.

Sift dry ingredients together (flour, soda, powder, salt and cinnamon) into a large mixing bowl. In a separate bowl beat eggs, applesauce, oil, sugars, and vanilla until combined. Pour the wet mixture into the dry mixture and mix until combined. Fold in grated carrots (and pecans if desired - or you can sprinkle them on the cream cheese frosting as a garnish). Pour into prepared pan and bake 40-50 minutes for a 9x13 pan or 45-55 minutes for a bundt pan or until toothpick comes out clean. Cool bundt pan for 10 minutes before turning onto plate. Cool completely before frosting.

For the frosting, beat butter and cream cheese til smooth. Add salt, vanilla and powdered sugar and mix until smooth.  Frost as desired.

Recipe Source:


Adapted from this recipe on Allrecipes.com


Wednesday, October 19, 2016

Southwest Jack-o-Lantern Stuffed Peppers

Looking for a fun, filling, and healthy Halloween dinner? Look no further than these adorable jack-o'-lantern stuffed peppers.  They are cute, festive, and delicious!  And the filling can be made ahead!
Grab the full recipe and printable over at Or So She Says and let us know if you make them!


Turkey Bacon Parmesan Panini


We are sharing the recipe for this killer panini over on the Rhodes Out of the Oven Blog today.  It's a favorite and one we never tire of.  

It is  made extra delicious with homemade taste of  Rhodes Bake and Serve bread.  Filled with turkey, bacon, avocado, parmesan, and apple slices this sandwich is sure to satisfy!

Sunday, October 9, 2016

Chicken & Veggie Yakisoba


Do you ever get stuck in a rut with dinner? I feel like we do that quite often. And have been more and more with a new baby in the house!  I was anxioius to try something new and Leesh gave me this yummy recipe for Chicken Yakisoba.  We've never had autentic Japenese Yakisoba - so we can't tell you how authentic this is, but we can tell you how delicious it is and that both our families gobbled it right up (even the 18 month old).  

We're sharing the full recipe and printable on Or So She Says. Check it out!


Saturday, October 8, 2016

Snickerdoodle Cookie Bars


We love sinckerdoodles!  Lately I can't decide between a fresh warm snickerdoodle and a chocolate chip cookie!!! But sometimes I don't want to take the time to roll out those perfect little balls of delicious dough.  That's where these Snickerdoodles in bar form come in handy. We get the fix without too much work.  And hey, you don't have to hang out around the oven until the last pan of cookies is finished baking either. Win-win!  Snickerdoodles from start to finish in 30 minutes! I'll take it!
Don't you love a good snickerdoodle? I do!  To me a "good snickerdoodle" equals a tangy cookie that is baked to a chewy crisp on the outside and still soft in the middle. Mmmm, these bars give you the best of both worlds.  The outside of the pan gets that nice chewy crisp, and the middle stays perfectly soft.

We thought the cinnamon chips added the perfect touch here.  They are optional, but if you're looking for them, they can be found at most specialty kitchen stores.  They make the most amazing cinnamon chip bread for french toast, too!
Make sure to serve them warm with a glass of cold milk and they'll be sure to hit the spot!


Snickerdoodle Cookie Bars

Yield: 9x9 baking dish (9-12 cookie bars)
Ingredients:


½ cup butter, melted
½ cup white sugar
⅓ cup brown sugar
1 egg
1 teaspoon vanilla
1 ½ cups all-purpose flour
¼ teaspoon baking soda
½ teaspoon cinnamon
¼ teaspoon cream of tartar
¾ teaspoon salt


Topping:
1 tablespoon white sugar
½ teaspoon cinnamon
2 tablespoons mini cinnamon chips, for sprinkling (optional)
Directions:


Preheat oven to 350 degrees F.


In a small bowl cream the butter and sugar together. Add the egg and vanilla and mix to incorporate.  In a separate bowl whisk together: flour, soda, ½ teaspoon cinnamon, cream of tartar and salt.  Stir the flour mixture into the butter/sugar mixture until smooth.  


Line a 8x8 or 9x9 baking dish with foil so it slightly hangs over the edges on two ends for easy removal -  and lightly spray grease.  Press the cookie dough mixture into the pan, you can leave a ½ inch space around the edges - as it bakes it will travel to the edge and climb up the edge less if you leave the gap.  


In a small bowl stir together the topping mixture of cinnamon and sugar and sprinkle evenly across the top of the cookie dough.  Sprinkle the top with mini cinnamon chips if desired (they are a fun garnish - but not necessary for the taste).  
Bake for 20-25 minutes or until a toothpick comes out clean. Cool on a rack until completely cool. Lift the bars out by the tin foil onto a cutting board and carefully remove the foil.  Cut into bars. Enjoy with a glass of cold milk!


Recipe Source:


Originally shared on Eighteen25. Adapted from my favorite snickerdoodle recipe from I Dig Pinterest

Saturday, October 1, 2016

Spooky Guacamole Bowl


It's October!!!! I can't believe  the year is winding down. We are looking forward to the upcoming holidays! We shared this recipe a few weeks ago on Eighteen25's Spooktacular September series. Check it out for some fun ideas! We love fun and festive food for any holiday, but oftentimes Halloween food can cross a line that makes it a bit unappetizing.   We're all about making fun festive food that doesn't make you cringe! :) 


We like to "spookify" our favorite foods.  So enter Spooky Guac.  [Sidenote: I did come across a Halloween guac recipe called "Guacamoldy", but even that was too much for me to be able to call it that and still eat it.]  Isn't guacamole the perfect party food and the perfect color for a Halloween spread? And the kids think it's totally awesome to have a spider and her web in the guacamole bowl.


We simply used 2 olives to make a quick little edible spider--a little black spider ring (dollar store) would also work great too! For the web, we just piped some sour cream into circles and dragged a toothpick (or chopstick) from the center to the outside edges to get the spider web effect.  You could use any guacamole, but here's the link to our favorite guac recipe.  


It's fun, cute, and festive and doesn't take too much effort--so add it to your Halloween party menu/celebrations!

Here are a few of our other Halloween faves:


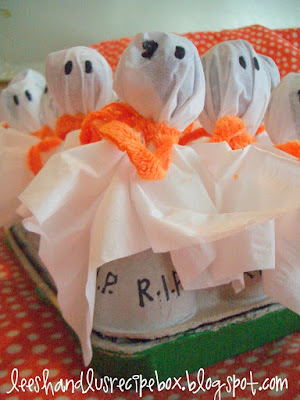
Tootsie Pop Ghosts {in an Egg Carton Graveyard}